Creating a Basic Ad-Hoc Search
This example takes you through creating a search to find permanent and applied patients, with an accidental fall in the last 12 months, you can use this example updated with your criteria to create a basic search:
-
From Search and Reports, select Ad-hoc search
 .
. -
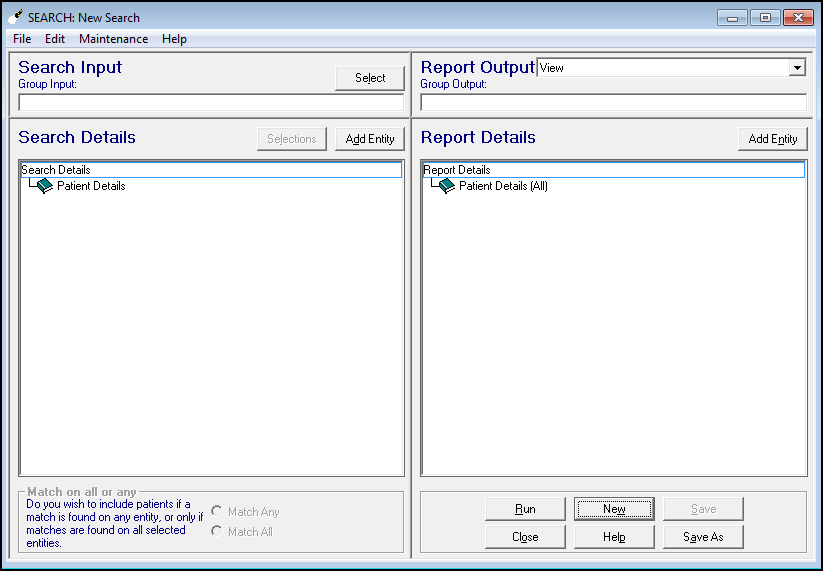
The Search: New Search screen displays:
- Select Patient Details under Search Details:
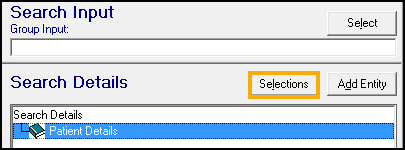
- Now, select Selections.
- The Criteria Select screen displays providing extensive options, allowing you to define your search. For our example, we want to find active patients so need to search on Registration Status. Scroll until you see Registration Status, and select it:
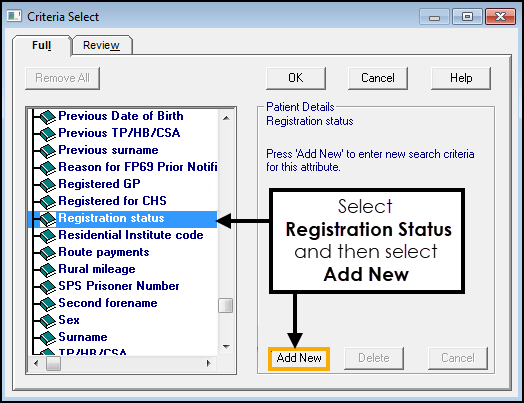
- Select Add New, to choose which registration status to search on.
- Select Applied and then scroll down the list to select Permanent, the criteria updates on the left hand side as you add items:
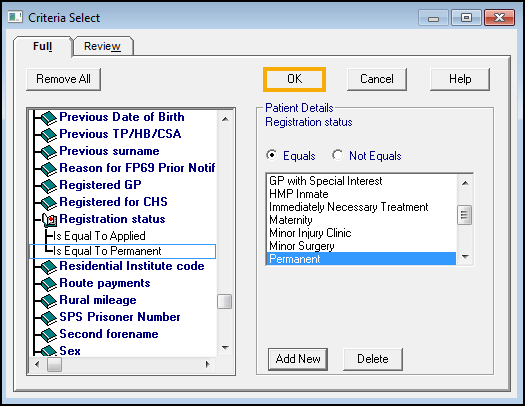
- Select OK and the mail search screen updates.
- Select Add Entity
 next to Search Details and the Select from Group screen displays.
 - We want to search for a medical history item, so double click on All other Clinical Data, and again on Medical and Family History folder:
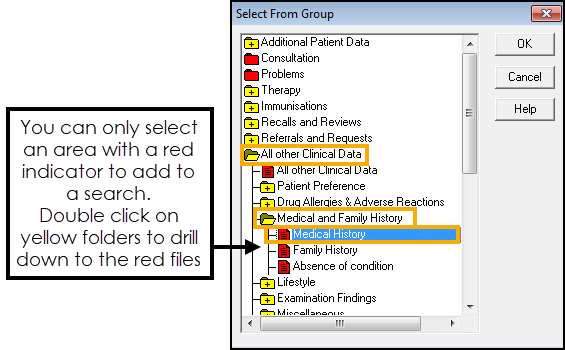
- Select Medical History and then select OK.
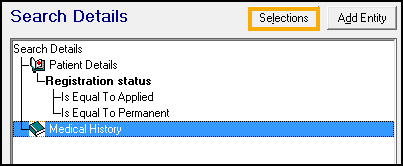
- From Search Details, highlight Medical History and then select Selections.
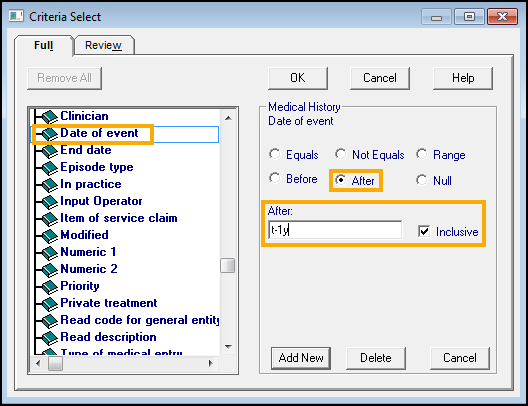
- In Criteria Select, highlight Date of Event and select Add New.
- We are looking for an event in the last year, so select After, and enter T-1y (Today - 1 year), leave the tick Inclusive to include today:
- Select Add New, to add more criteria.
- Scroll down and highlight Read code for general entity, select Add New.
- Either:
- Type in the clinical code directly, this is case sensitive, in this example TC, as we are searching for Accidental Falls, or
- Select Read Select to find the clinical term by either hierarchy or keyword:
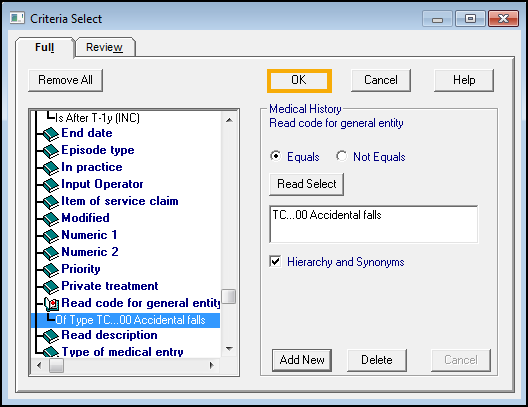 Note - If you leave the Hierarchy and Synonyms box ticked the search returns any matches below this entry in the hierarchy.
- Select OK to update the Search Details.
- Select Run to generate the report.
- Optionally, select Save As to save the report criteria for future use.
See Creating a Recall Search for details.
Note – To print this topic select Print  in the top right corner and follow the on-screen prompts.